Showing posts with label Cricut. Show all posts

Sunday, December 27, 2015

Wintertime is Golden

Hi Everyone!

Today I'm just showing you a card I made to give out for Christmas. She is an image drawn by Elaine Cox I had found at Sweet Pea Stamps... that company is no longer and I may have to look for Elaine Cox's page to see if I can but more of her images. This one is called Moon of Wintertime.


I colored her with Copic markers.
A gold Sakura Gelly Roll for some shimmer, Copic Atyou clear for the snowflakes.
The 6x6 paper is from Craft Smith and it's called Holiday Foil...
I found that at Michael's and I almost put it back- it's fabulous with dies as you can see.
The Poinsettia I made a long time ago with my Cricut.
The layering die is from My Creative Time
The "Merry Christmas" dies are from Paper Smooches
called Christmas Words.


Here here it is from the side so you can see it's a gold foil cardstock

Hope you liked my card.

Thanks for stopping by,

Katya Bess 

Monday, October 19, 2015

For the Cutest Pumpkin

Hello Crafty Friends,

Coming in today to show a little card I worked on.... I know it's kind of late for posting... but I'm doing last minute loads laundry, then I need to have it dried and ironed before tomorrow so yea.... LOL     That's what I get for doing the fun crafty stuff first right? ProCRAFTinating at it's finest.

So here is the cute card I made (well I thought it came out cute teehee.)

I used Lorraine - Hello and Our Lil Pumpkinhead to create this little scene card. 

I used:
Copic Markers
Glossy Accents for the eyes
Doodlebug Design Inc 6x6 pad called Fall Friends
Cricut sunflower die I cut and assembled a really long time ago.

You can check out a few more details at

Thank you for stopping by,

Katya Bess

Saturday, December 27, 2014

Secret Santa Swap with Mr. Frosty

Hey Everyone,

Just wanted to share this little card I made for a Secret Santa Swap a while ago... I guess I could share the card I made but the card I received I will have to show next month???

I bought two of these stamps because I thought they were so cute. I had to buy one for Pam and one for myself. I've done the swap thing too many times where I bought something for the receiver and then I couldn't find one for me. LOL

I bought Mr. Frosty of Whimsy Stamps from Jamie's store: https://www.zibbet.com/not2shabbyshop.
Jamie often  has sales and even little monthly contests going on in  her Facebook fan pagehttps://www.facebook.com/groups/103832353026882/ oh and she announces the challenges or sales on her YouTube channel https://www.youtube.com/user/ScrappinStampers Just check her out she's very sweet and very fast at shipping.

 I colored him up with Copic markers
I made the flowers with my Cricut
The paper is from Recollections. 

 Here is a close-up of the image and snow with Frantage embossing powder
Here is to show the two stamps I bought... 
of course the one that is out and trimmed is mine.

Thank you for looking. 

Katya Bess 

Thursday, July 31, 2014

Christmas in July: TGF

Hello there Crafty Peeps,

Just stopping by to show off a quick (well not so quick initially) card I made. I colored this image a while back but just not made it into a card. I hope you like it. It's a Rubber Stamp that I actually have two of. LOL How did that happen I'm thinking I need to sell one or give one away... I'm 50%/50% on both ideas.

I used Holiday Anya just click on the link (but currently it's out of stock)


I used Spectrum Noir to color her and the background.
I cut that poinsettia with my Cricut a long time ago I just added Studio G glitter glue for the center 
to finish it off. The Merry Christmas greeting is from a clear stamp that I don't have the packaging.
I hope you liked my little card. 

Thank you so much for stopping by.

Katya Bess

I'm entering my card at: 

Wednesday, February 20, 2013

Valentines Bucket Swap Blog Hop

Hi Everyone!

Hope you all are having fun seeing what our swap buddies gave each other. If you're coming from Wendy's blog www.jazzydoodledesigns.com then you're in the right place. If you're just coming over to visit (awww thank you very much) please head on over to Simply Betty's Blog. The hop line-up is at the bottom of this post. 

My swap buddy was Roz from Florida, very nice lady. Can't belive how many things we have in common from tv shows, to food, plants and crafting ;) Roz got me all of these goodies many which I have not used before and wanted to get but hadn't yet. 

Love my goodies Thank you so much Roz.
This is her blog
http://www.wolfepak5.blogspot.com/
show her some crafty love :)
___________________________________________________________
I got a bucket online and the things I got a little to happy buying didn't fit
on her bucket so I decided to make her an Valentine's Day heart box
with the colors I think she'd like from what she posted on SBS fan site on FB.
The box is like 10"x11"
and I used one of Simply Betty's Digital stamps
My Funky Valentine Betty digi

I painted the heart and roses I made with pearlescent acrylic paint
but it's hard to tell from the pictures. Everything is very shimmery.

 Note* I forgot to add the colorbox that's in the heartbox :(
but I added a bag of Tootsie Rolls before I took it to the post office.
Roz stated she loves dogs so I bought these peachy keen face stamps
I hope she loves them 'cause I don't have those myself. LOL
Those are some of the flowers I made and hand painted as well.
At Simply Betty I'm noticing that there are many many Steampunk
challenges and digis so I decided to go that route when buying the goodies. 
I bought some of those things for myself and I haven't done steampunk besides
this heart box but hopefully I'll be able to start learning this Steampunk style.
I wasn't a Halloween person but Betty's images are so cute... I think I'm a bit
of a Halloween convert lol.
Anyway enough chatter from me... can you tell I'm at home with kids all day?
Heehee... next up is Stacey http://anastasiasarts.blogspot.com/ . Enjoy the hop everyone!

& thanks for visiting.
Katya Bess


Vanessa
Jennifer
Roz

Tuesday, February 19, 2013

Kids Cricut Valentine's Day cards 2013

Hi there Crafty Peeps!

A little late posting on my blog... some of you gals may have seen these on Facebook where I posted before Valentine's day. These are the little cards I made for my Kindergartner daughter:

Using Create A Critter Cricut Cartridge and a Peachy Keen Stamp for the eye
Using Create A Critter Cricut Cartridge and Peachy Keen Stamp for the face
 The little cards measured 3.5" x 4"
from an 8.5 x 11 sheet of cardstock I made 
3 cards and only had to trim off half an inch.
Originally I made 17 boy cards and 8 girl cards
but the decided to make a few more (not pictured)
Along with the cards she gave Valentine's Day heart candy boxes.

Yup, there were lots of cards but surprisingly didn't take as long as 
coloring. I "coached" my daughter into choosing characters that
didn't have too many layers... 'cause at first she wanted Hello Kitty 
cards for all of the girls. If I hadn't started as late as I did I sure would 
have 'cause I love Hello Kitty. Maybe next time... Easter maybe.

Thanks for visiting.

Katya Bess

Places I entered my creation:
http://www.cardztv.blogspot.com/2013/02/exciting-news-at-cricut-cardz-challenge.html
challenge #125 Critter Cuties (I'm entry #36)

Friday, February 8, 2013

Happy Birthday Rio + Bloghop

Hello Everyone!

Hope all is well and having fun hoping with the SBS gals and fans.
You have to start at SBS http://simplybettystamps.blogspot.com/ because you don't want to miss out.


Here is my card:
Image is Zombie Rio
Happy Birthday Rio J.F. Hope you are having so much fun!!!
Rio loves rainbows so I made her outfit very colorfull.
I colored with the clothing with Copic markers
and the skin with Spectrum Noirs.
I tried to give her the "undead zombie skin."

Skin: Spectrum Noir FS2, BG1, BG2
Cheeks: Spectrum Noir FS2 and CR5
Eyes: Spectrum Noir (Sclara) IG1 + Blender (Iris) BG10
Skirt: All Copic B02, B05, YG03, YG09, R17, R39, YR04, YR07, Y35 and Y23
Open Flesh: Copic E07 and R81
Bone: Spectrum Noir GB10 + Blender
Lips: Copic R81 + Copic Spica: Clear
Heart: Copic R37
Book: Copic B24
Shoes: R17, R39, E41, C1 + Blender

The letters spelling out her name were cut 
with my cricut machine with cart Country Life
I chose that one because the letters sort of look like bones. 
The sketch is from 
The Sweet Shop
SSS196

Here is the blog line-up:
Corinne http://wishuponascrap.blogspot.com & Lisa Nelson


You are here---->Katya : http://www.kattyxotica.blogspot.com/
Trishthedish http://www.scrappintillthecowscomehome.blogspot.ca/  
Sharette: http://www.scrappernthemaking.blogspot.com/
Summer: http://www.1craftypainter.blogspot.com/
+1 more added late ;)
Dianna : http://www.diannas-craftyplace.blogspot.com/
Thanks for stopping by

Katya Bess

I entered my card at:
http://sweetstopsketches.blogspot.com/2013/02/sss196-february-2.html
I'm entry#40- Use sketch provided

http://blog.oozak.com/2013/02/anything-goes-challenge-with-your.html
Entry#102- Use your favorite color combo (What can I say? I love all colors especially brights... heehee)


Tuesday, December 11, 2012

Christmas card swap hosted by Cricut Crafts

Hi Everyone!

I'm back for a little while.... Just wanted to show the cards I made for a Christmas Card Swap I joined. It was a small group which was good for me because of family life adjustments here and there (new baby) but I really wanted to join something this year. It ended up being 6 of us total so I only had to make 5 cards but I made an extra card which I will mail out to a Hello Kitty fan/bloggy friend lol. Anyway, here are my Hello Kitty snow globe cards:

I hadn't really used my Cricut in a long time and on top of that I hadn't
used my Hello Kitty cartridge in a really long time.  
 The cards measure 5x7. 
Carts I used are: Hello Kitty Greetings, Create a Critter and Joys of the Season.
I used Stikles for the falling snow holes. 
The snowflakes are from Martha Stewart's Aspen Snowflake around the page punch set .
The Hello Kitty rubber stamp on the envelope is from Target.
The "Merry Christmas" sentiment is from My Creative Time.
The Buttons on Hello Kitty's coat are from Viva Decor Pearl Pens
Here is a close up of the card. I mailed all of these in 
cellophane envelopes so that my recipients were able to use
blank envelopes... I mailed them all out on the 1st of December 
I hope all of the ladies have received them. I'm still waiting for one card.
The ladies are: Lourdes (swap host), Luz, Jessie, Gloria, Gina and myself (Katya)
You can request to join the facebook group at:
There are a lot of talented ladies there. 
Some even have YouTube videos with tutorials.
I love the cards I received. I hope I wasn't too bad for my first swap
and hope they liked the cards I made for them. 
Can you believe my daughter Jade got to do a card swap before me? LOL
 I'd like to finish stating this was a fun experience for me
especially checking my mailbox with my daughter Jade and opening the cards together.

Thanks for stopping by.

Katya Bess


I'm entering this card at:
Tis the Season! Cricut Cardz Challenge #122: Christmas or Hanukkah card using any cartridge

Holiday Spirit

http://scrappymoms-stamps.blogspot.com/2012/12/terrific-tuesday-challenge-christmas.html
Christmas card, layout, ornaments... etc.

http://abcchallenges.blogspot.com/2012/12/abc8-let-it-snow.html
Create a card using either snow, or snowflakes, or a snowman.  You can use one or all three if you like, it's up to you.  Show us some snow!

*


Tuesday, October 9, 2012

Simply Betty Stamps Secret Release # 3: Sneak Peeks Day 3

Hello everyone!

Coming back today with another fun project featuring Simply Betty Stamp

Betty Little Dark Mistress 

Make sure you start from the beginning so you won't miss any of the amazing project. If you're coming from Rachel's page  http://rachelspaperwishes.blogspot.com/ then you're in the right place; if not then your starting point should be at: http://simplybettystamps.blogspot.com/ 

Super fun image and I do see myself making different cards with it (it'll help my coloring too.)

So here I present her to you paired up with Morning Betty (an older stamp of SBS)

I'm showcasing the card as a filmstrip (snip) inspired by the movie:
Elvira- Mistress of the Dark
This is the scene where her car breaks down in this "conservative town"
where she's told she doesn't fit in.
I cut the film strip with my Cricut but since I don't have a cartridge
with a film strip I just "created" one with my Gypsy. 

Hope you like it. 

Next up is:

Aeryn Kelly-Reitmeyer http://www.aerynkelly.com

Thank you for visiting :)

Katya Bess


Challenges I'm entering:

Your favorite Halloween character


Wednesday, October 3, 2012

13 Days of Halloween, Day 1


Hello Everyone!

Hope all is well. I have a Halloween tag for you today. I haven't really been a "Halloween" type of person but ever since I been following Simply Betty Stamps I'm diggin' the theme. Her stamps are way too cute which I been buying from time to time but haven't had the time to color or after seeing others show case them I get a little intimidated LOL but we all have to start somewhere so I'm starting to use my SBS digi stamps which until recently I was just hoarding them in my computer. Anyway check out http://simplychallengedchallenges.blogspot.com/ there you'll be able to participate on SBS 13 days of Halloween. The first challenge is:

 Trick or Treat for a Tot or anything for a child. 


Challenge Guidelines: 
1. Make anything suitable for a Child, a treat bag, a page layout, card, anything as long as it is Halloween and for a child!
2. There must be at least 6 entries for the prize.
3. Winner will be determined by popular vote by the DT
4. Must be a new project never posted on any online sites

I have created a tag for my daughter Jade. I'm going to tie it to her Halloween candy bucket (some call it "Halloween pail") when she takes it to school on Halloween, when we take her out trick-or-treating and then she can just keep in her room as decoration.

For this tag I used S.B.S.: Pumpkin Mickey Hat Betty Digi
the back just has her first name. 
The tag was cut with my Cricut
 The papers are from a punch pad by Martha Stewart
The sentiment I just typed and printed it out
The sheer ribbon is from the Dollar Tree
And I used a spellbinders die.

I'm still working on my "highlights" and or 
lighting/shading technique with markers
but slowly getting there... 
by observing the lovely crafters at SBS and other groups of course

Here is a close up of the digi image. 
I used Copic markers to color her face, body and costume 
BUT I used Spetrum Noirs to color in her hair. 
I tried to go lightly with the Stikles on the Mickey hat...


My daughter loves her tag hope you like it.

Thank you for visiting.


http://partytimetuesdays.blogspot.com/2012/10/ptt88-frightfully-scary-projects-and.html
"Frightfully Scary" projects and cards.  Anything Halloween will do (even cute!).

http://blog.ribboncarousel.com/2012/10/rcc73-halloween-spirit.html
Halloween Spirit: MUST use Ribbon or Twine

http://foreverfriendschallengeblog.blogspot.com/2012/10/monthly-challenge-of-october.html
Monthly Challenge of October: Use their BINGO chart. Mine falls under Ribbon, Glitter and a Tag.

Challenge #85... Trick or Treat + a Die Cut or Punch

http://stampingscrappingchallengecentral.blogspot.com/2012/09/halloween-ready.html
Halloween (Use at least one item that can be found at Stamping Scraping.

http://redcarpetstudiochallenge.blogspot.com/2012/09/rcs-5-anything-goes-disney-challenge.html
Anything Goes: Disney themed challenge

http://designedtocolor.blogspot.com/2012/10/october-theme-week-last-day-halloween.html
Freaky and Frightful (Halloween Free 4 All)


Friday, September 7, 2012

Monster Mash Party Hop

Hello Crafty friends,

***I'm late :( yes, I know I suck... which is why I chose a vampire (j/k) lol that was a coincidence*** AND please be nice this is my first "Halloween card."

If you're coming from: Irene Sherman  http://irenescardcreations.blogspot.com/ then you're in the right place otherwise start at http://simplybettystamps.blogspot.com/2012/09/monster-mash-party-hop.html

I used Simply Betty (digi) Stamp Verity Vamp and Boris the Bat I chose to color her in in warm grey tones following one of Ms. Betty's YouTube tutorials... this is also my first time using this technique. I only have a very small supply of Copic markers so I substituted the colors with my Spectrum Noir markers. I make my own paper roses and for some reason they always seem to come out different.... For these rose petals I used my Cricut but the leaves I used a Spellbinders die.

The card- Ta-dah! (I got that from Betty's video lol)

Close-up* small elements colored in with Sakura "Red Star" for that shimmery look.

My own paper roses.

Enlarged and cut out an element from Verity Vamp's top hat 
to tie-off the rose bouquet. 


Happy hopping and thanks for visiting ;)

Crafty Hugs,

Katya Bess

I'm entering this card at:
Freaky and Frightful (Halloween Free 4 All)


Wednesday, July 18, 2012

Hello Kitty Composition Book & Bookmark

Hello Everyone!

Hope all is well. I finally finished my first altered composition book. I used my Cricut Expression to make the shapes and letters. I made this especially for Rosie Mini's challenge: Hello Kitty Birthday Challenge. Here is the link: http://www.scraplovingminis.blogspot.com/2012/06/hello-kitty-birthday-challenge.html

Rosie's daughter is turning 19 years old TODAY! Happy Birthday Ruth! She loves H.K. as so does my daughter and myself.
I left space at the top to "personalize with a name"

I used my Hello Kitty Greetings Cartridge to alter the composition book and make the tiny bookmark. I now kick myself in the butt for not buying the Hello Kitty Font when I had the chance; I went on eBay to "try" to buy it and ALL and I mean ALL listings were over $100.00 that's crazy! I just used Baby Steps cartridge to create the font this time. I embossed the glasses on the big Kitty and the small Kitty (LOL) to give them that "shiny" look.

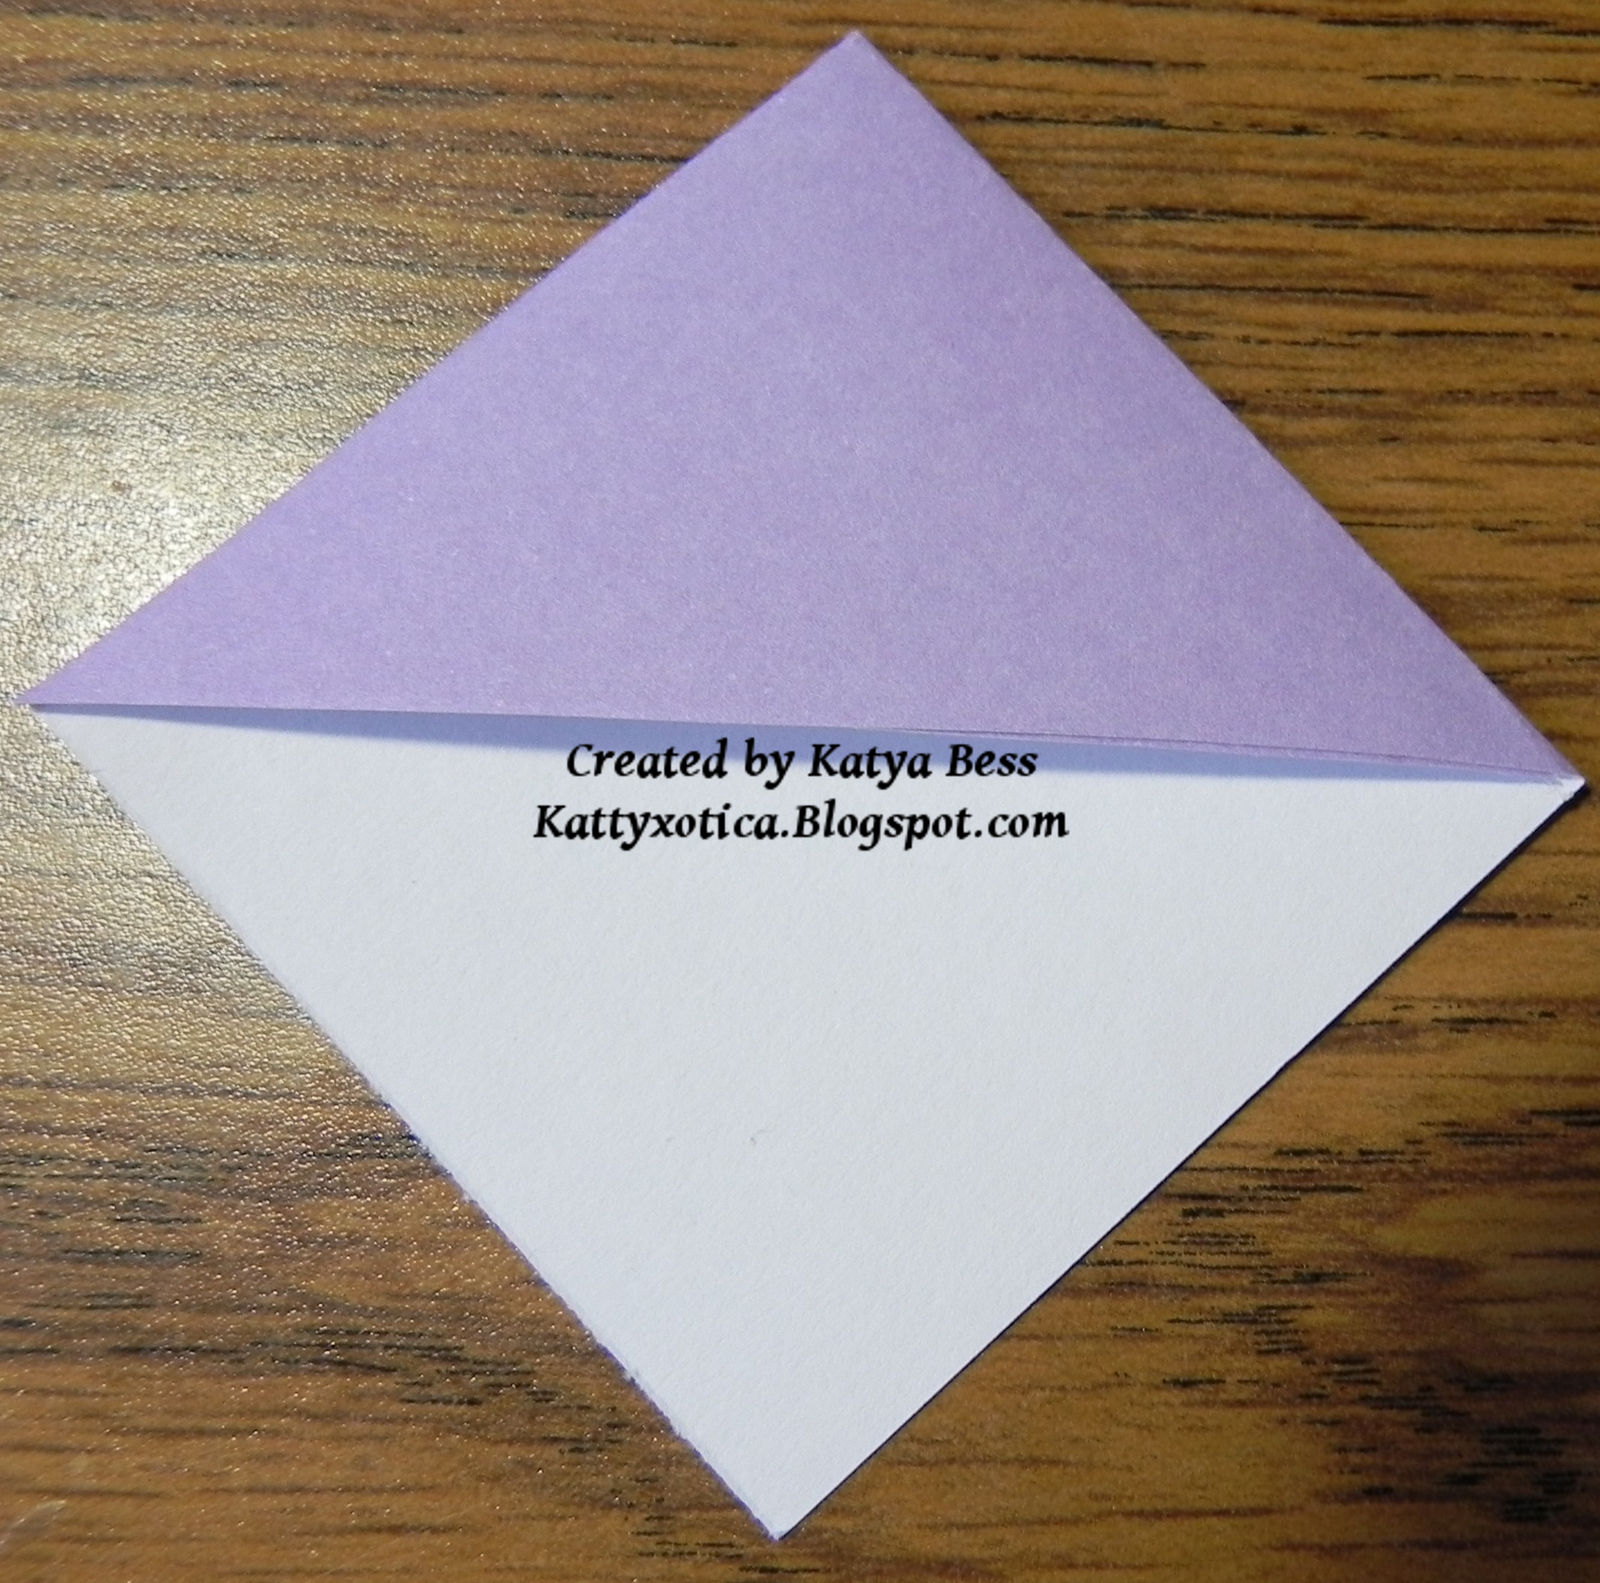
Here is a "mini bookmark tutorial:"
With a square about 4 inches or so. Mine was 3&3/4 by 3&3/4
fold in in quarters. Cut the as shown in the pix. You'll have
1 square and 2 triangles that you can toss or keep as scraps.
on one of the triangle flaps I also cut just a sliver because
when I folded it down it created a little bulk. 

Fold in this fashion...

use bone folder if necessary to make the crisp folds

paste your nerdy Hello Kitty.
Finished bookmark


Hope you had fun... now to link up at Rosie's place.

Thanks for visiting.

-Katya Bess