Showing posts with label Spellbinders. Show all posts

Saturday, June 6, 2020

7 Kids Crafts: Mahalo

Hello Everyone!


I am are excited to to participate in the New Hawaiian Vacation Stamp release, illustrated by Maria Medel @Mmedel_Illustrations, exclusively for 7 Kids Craft Store! We hope you'll enjoy our creations and be inspired by our talented design team.** To participate, visit each team member’s Instagram account, and leave a comment on their post. When you're finished head to @7kidscraftstore and leave a comment also saying that you completed the Hop!

You have until 2pm MTN on Friday June 12th to comment (on instagram). One random winner will win one of the new Stamps sets from the @7kidscraftstore
Without further ado, our design team members are:

Beata June @craftybee34
Janice Wilson  @jwilson809
Kerys Sharrock @craftybritmama
Marcia Caradinta  @thefrolickingfairy
Monica Edwards  @monicascrapstreasure
Katya Bess  @Snappykatty
Christine Copic  @christinecopic
Monika Hassel @monhasse
7 Kids Craft Store  @7kidscraftstore
Let's get Hoppin! 


For my card I used the 7 Kids Crafts exclusive stamp set called Mahalo


For my card I used Copic markers.
the backsplash paper is by Doodlebug Design: Fun in the Sun
the sand and sunset I created with Distress Oxide. 
The dies are from Spellbinders, My Creative Time and Hello Bluebird.


A big mahalo to everyone who stopped by. 

Katya Bess

Friday, January 3, 2020

You're the Icing on my Cupcake

Hello Everyone,

Just wanted to share a little birthday themed card. This stamp set is called:
and I purchased it from one of my crafty online friends on her crafty destash instagram page:
Check out her page she posts a lot of the stamps or dies that she no longer uses and 
many that I've purchased are still brand new.

The paper which inspired the colors I used is 
Bubbly Girls by Find IT Media Kampen (Yvonne Creations)
I got that paper pad from one of Kim Reid's live "Shop the Box" sales on her


Thank you so much for stopping by.

Katya Bess


I'm entering this card at:

Wednesday, June 19, 2019

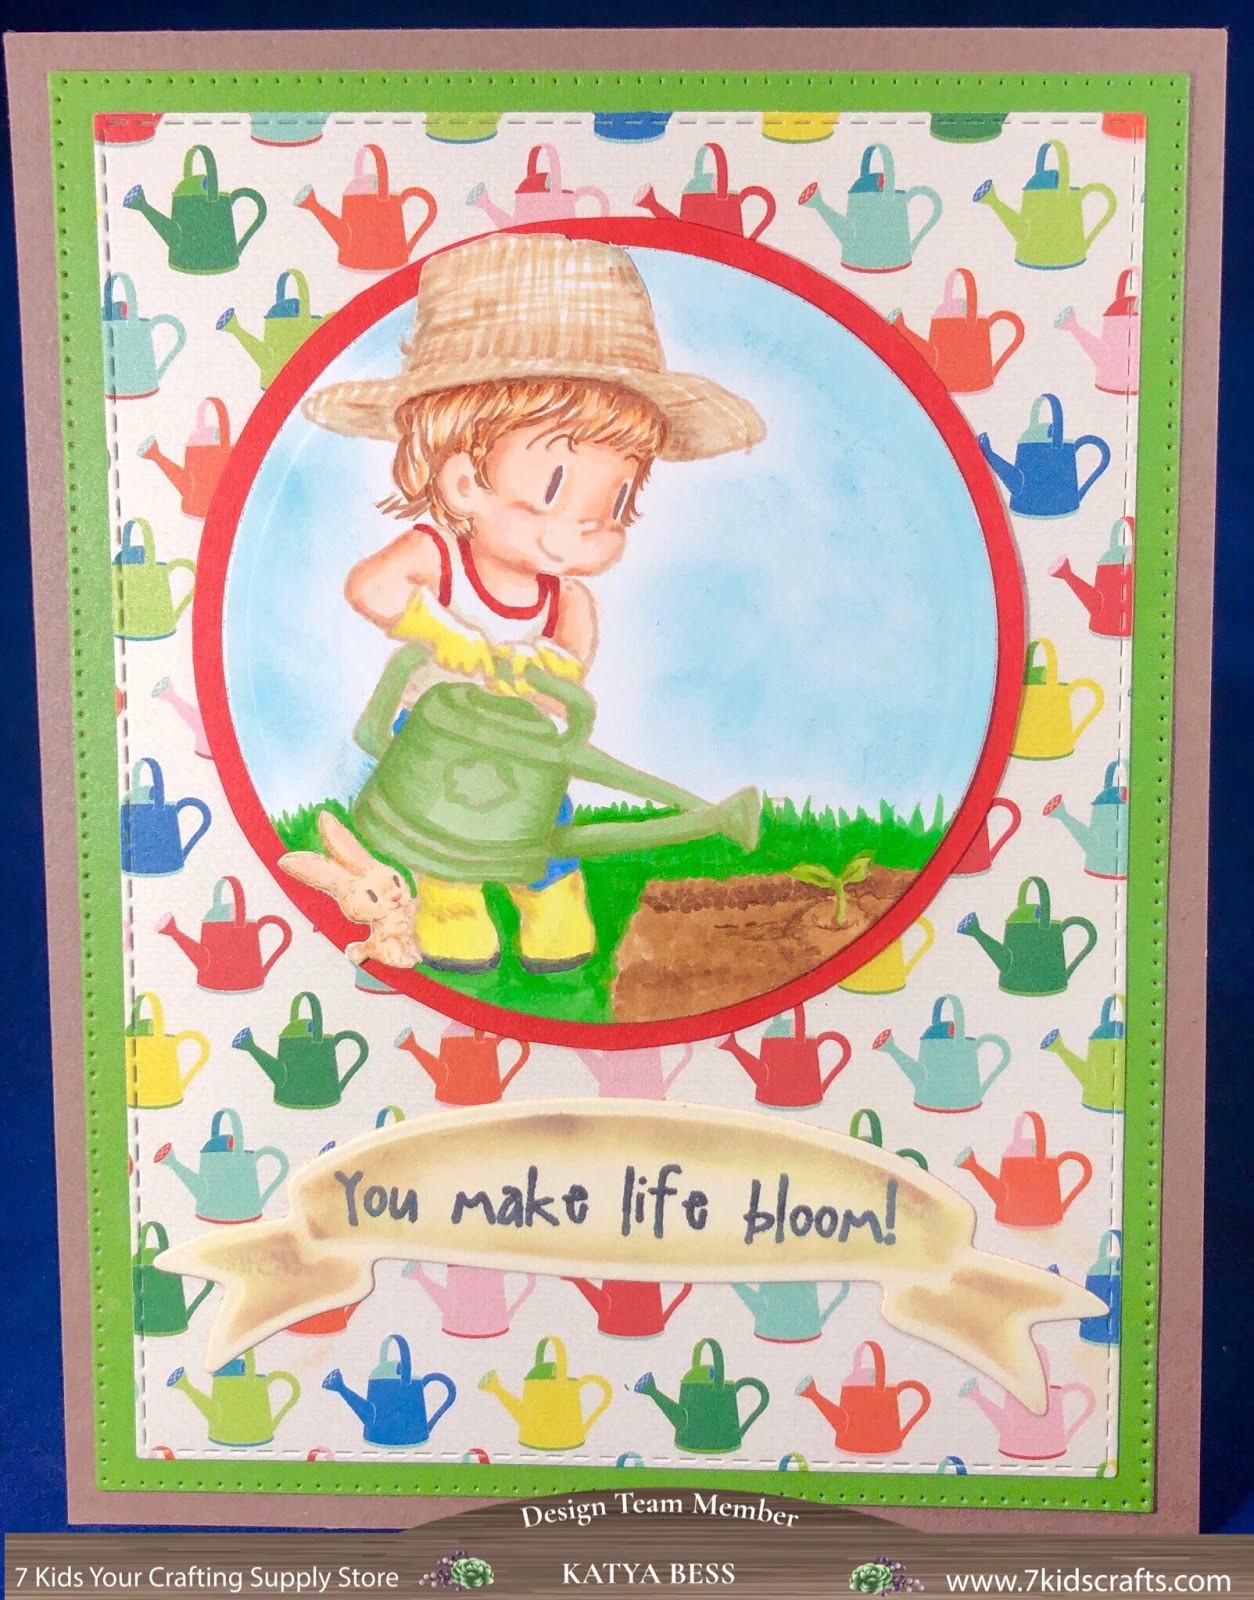
7 Kids Crafts: You Make Life Bloom!

Hello Everyone!


I used a Dreamerland Crafts stamp. Just an FYI all of the stamps from Dreamerland Crafts are part of o the Vendor of the Month sale at 7 Kids Crafts using code DREAM for a 20% off discount.

Nourishing Life


To make sure not to cut around the bunny's tail, ears and the boy's hat I first fussy
cut around those sections so I can use the outer bounds method with 
the circle spellbinders die. I also don't have a circle that is 1/4 bigger
so I just traced the outer part of the circle die and fussy cut it.
I used Memento: Desert Sand ink (Copic safe) to stamp the image. I know I want to 
cut it with a circle die so I just traced my circle die before I started coloring.
I used the Homegrown 6x6 pad from Echo Park.
I used a little distress ink for the sky
and Distress Oxide for banner Shabby Shutters and Vintage Photo
and Kraftin' Kimmie rubber stamp for the sentiment.


Copic markers used: 
E0000, E00, E11, R11 
E23, YR12, E21
E31, E33, E42
R17, E07, E81, Y02, 
G28
YG25
E50, E51
G07, YG17, E55, E57
Thank you for stopping by.


Katya Bess

Thursday, February 22, 2018

LMMS Estrella hugs

Hello Everyone!

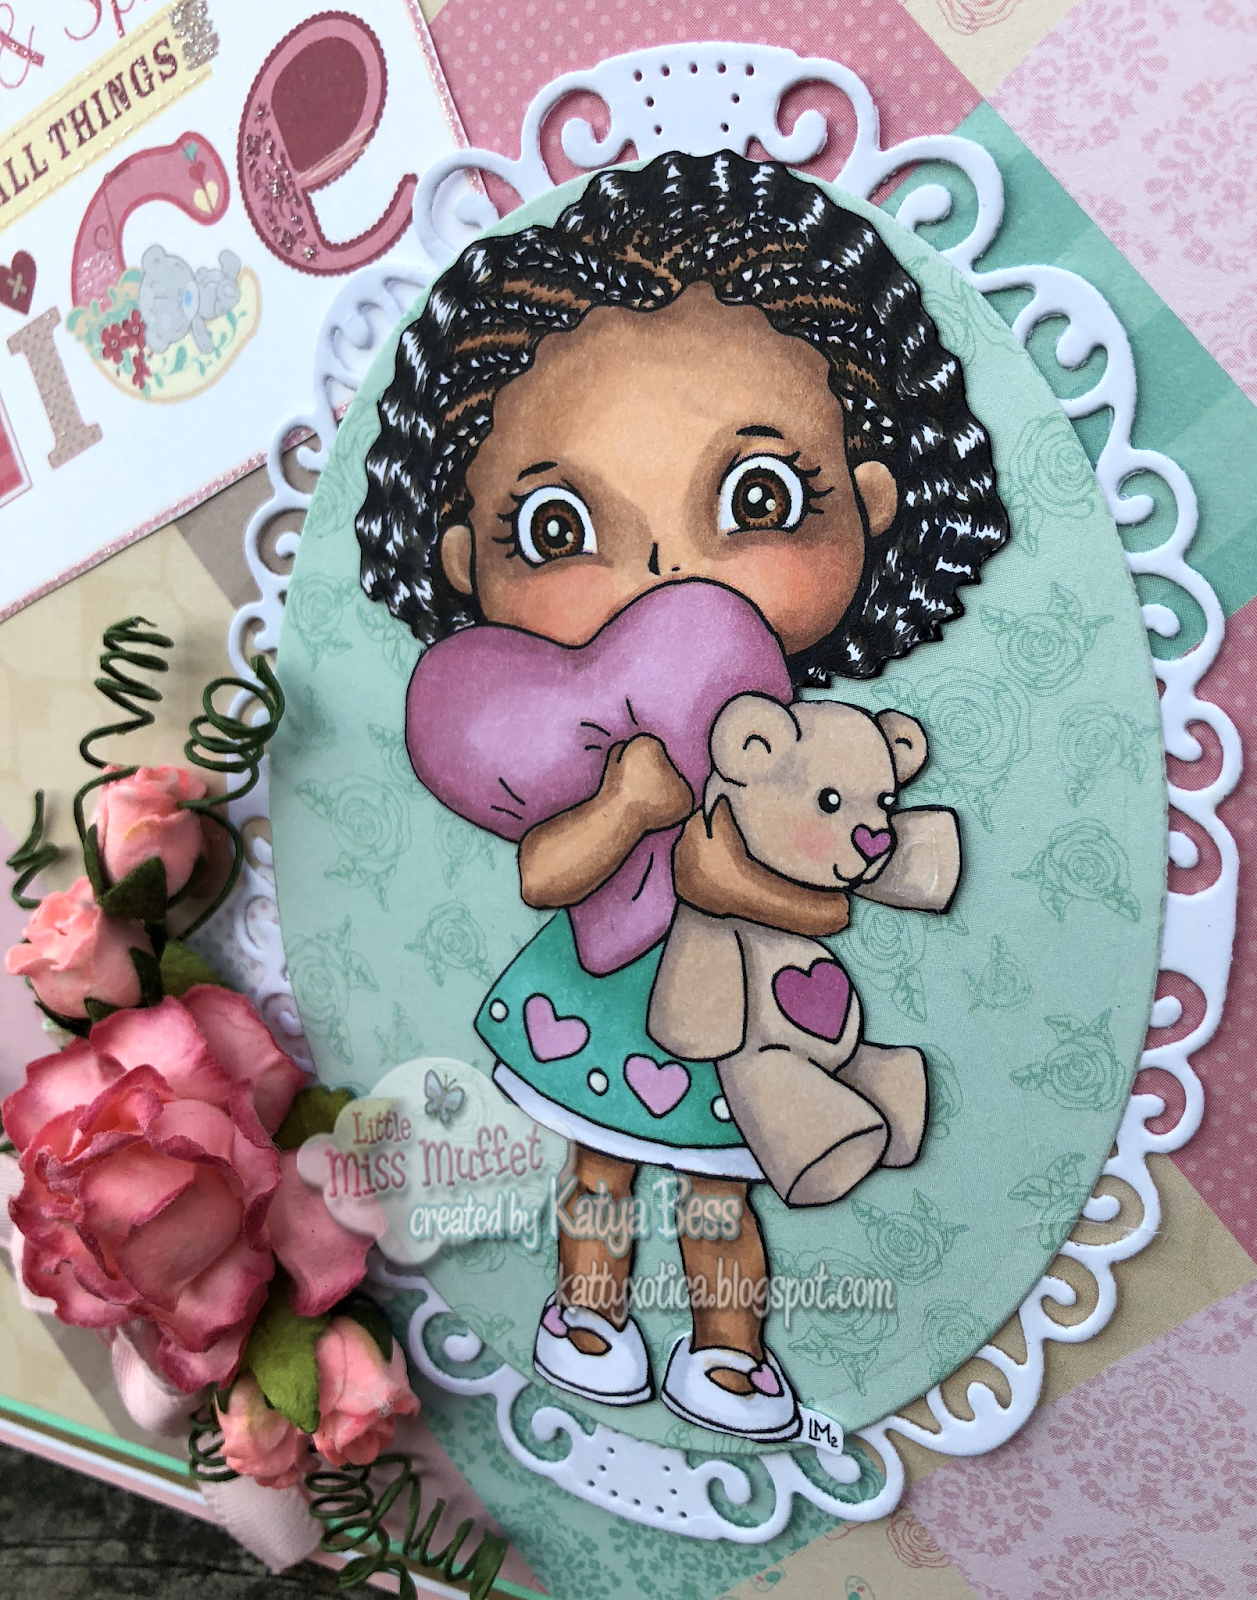
I hope you're having a fabulous day! Today I want to share an inspiration card that I created for Little Miss Muffet Stamps. I created this card in honor of African American History month and for the American Heart Awareness Month as well. I hope that you're able to find some inspiration with this card, I have listed the Copic Colors I used below.

The digital stamp from Little Miss Muffet Stamp is called 
and

Here is a little close-up of the image. 

Here is my Copic marker recipe:
E11, E55 and R30 
E99, E33, Muilti-liner Sepia 0.1 and Uni-Ball Signo Angelic
dress: BG32, BG34, BG23
RV11, RV32, RV34 and E04
bear: RV34, R30, E70 and E43
for the hair I used C9, W7 and W5

Spellbinder's Nestabilities dies
Elegant Ovals and the other one is a basic Oval
that I don't remember the name. 
The flowers I purchased from Jamie's Not2ShabbyShop
The paper is from Tiny Tatty Teddy Girl 6x6 Paper pack
 The sentiment also came from the same paper pack.
I home you like this card and hope that you 
got some inspiration from it.


Don't forget to check out the talented ladies over at
and make sure to join in on the challenges

Thank you for stopping by.


Katya Bess

Thursday, October 12, 2017

Kraftin' Kimmie October Crafty Guest Bloghop

Good morning!


Welcome back to Day TWO of our October Krafty Peeks
at Kraftin' Kimmie Stamps! Did you love yesterday's peek?? So beautiful, right?! Well then you're going to love today's peek too because we've got another gorgeous ANGEL!
It's EVANGELINE ANGEL!
I'm super excited to share this one because.....some of you have seen it already! That's because it was the Super Secret Krafty Klub stamp set that was included in the Khristmas Kard Kit!!! So those who preordered it already have it in their inky little fingers and you'll get to see their creations today because they are our fabulous GUESTS!
This adorable new stamp set comes with one large main image and three fabby sentiments!!
All of the Krafty Krew design team members and Special Krafty Guests listed below have lots of sweet designs to share with you today featuring the EVANGELINE ANGEL stamp set!
Be sure to hop around and leave lots of love at each and every stop because one lucky commenter will WIN a gift voucher to the krafty shop EACH DAY of the peeks this week! Plus we're doing a GIVEAWAY of the ENTIRE release on the Krafty Friends facebook page! The winners will be announced at the party so don't miss it!
Be sure to join us at the LIVE Online Release Party on Saturday afternoon at 2pm EST! We'll be checking out ALL of the FOUR new clear stamp sets, sharing fabulous creations, giving away prizes and having tons of krafty fun!
Happy hoppin'! 

Here is my card for the hop! Hope you like it!

I colored her up with Prismacolor Pencils
I added glossy accents to the lights and ornaments. The flowers are
from a poinsettia bunch from Michaels (originally white) the flowers are
from the Not2ShabbyShop, the papers are from Photoplay: Holiday Cheer
(the papers were included in the Super Secret Krafty Kit)
I lightly sprayed Tattered Angels Shimmer Mist around the background
and on the poinsettia.

I took the photos outside and got this warm glow from the sun.

Here's a close-up
I had these leftover white poinsettias from a project I worked on two years ago.
Originally I planned on using two poinsettia flowers but I changed my mind
and added smaller roses to sit next to one poinsettia.
I colored them with Copic refills and green details with a copic marker,
the center I added Nuvo Glitter drops called Ruby Slippers
that was included in our Super Secret Krafty Kit.

Thank you so much Kim Reid for letting us do this fun hop.
Thank you all for stopping by.
 If this is your first stop remember to hop along, 
the list of all of the all of the mega krafty ladies is right below.

Thanks,
Katya Bess


Friday, October 6, 2017

Snowball Fairy

Good morning!

Last night I was working on this fairy that I've had for a while now but I hadn't trimmed it. I don't know why I don't do it when I first get my stamps..... I need to get better with that. This one is a retired gray Rubber Stamp but it may have been re-made into clear or revamped I'm not sure.  I found  a photo of the insert online so you can see how it looked on the shop. I also took a picture of a fraction of the mess I had created while trimming and coloring this fairy. No, It's not cute but when I get most creative the results for my desk are spread out and messy. At the end I might start a new coloring with the same pencils or markers or I'll put everything away and start fresh.


The Flowers are from Not2Shabby Shop (I just colored them a little),
 The corner Snowflake die is from LaLa Land Crafts,
and the Oval dies are from Spellbinders and from Avery Elle.
The paper is from Doodlebug Design

 close-up
I used Sakura gel pens for some of the shimmer 
I also used iridescent Chunky Glitter from Recollections.


Here's some of my kreative mess
These are most of the Copic makers, a Copic Multiliner, a Sakura Gelly Roll,  
a Uni-ball Signo Angelic, and one Prismacolor pencil

Here is how the stamp set looks (only mine is lavender)


I used Kraftin' Kimmie's September Sketch 


I hope you liked my card. 

Thank you for stopping by. 


Katya Bess

Thursday, June 29, 2017

Time to Chill

Hello Everybody!

It's Summertime and it's time to chill or at least try to anyway with some ice cream. Haha Today I finished a card using a rubber stamp set "Dollie with Ice Cream" from The Greeting Farm The "Sweet Thanks" is from  "My Creative "Time We're Better Together" Stamp and Die Set. The banner die is from Spellbinders. The papers I from Doodlebug Designs "Sugar Shoppe." I colored her up with Prismacolor Pencils 150 set that my hubby got me for Christmas (I previously had the 72 set but not sure if I grabbed colors that are only on the 150 set... so yea.) Anyway, the hubby got a good deal from Amazon and it's actually a little cheaper that last time I saw about a week ago.
Took me a while to finish the card only cause I colored the hair and skin only and the left it on my desk for about a week... I was undecided on what I wanted the clothing and papers to be. I finally went to The Greeting Farm website and saw that this month they were having a Summertime challenge and of course I had ice cream as a theme going. woohoo! That just gave me a push to finish the card and not just leave it there for who knows how long.

So here's my card, I hope it's not too busy.... 
 Here is a close up. I had to re-draw the little squiggly fly-aways because
I had a hard time fussy cutting them. I was going to leave them on and just color
around them but it didn't look too good so I cut them and then it just
felt like something was missing. Once I redrew those little flyaways
the image looked complete.

 Here is a side view and you can see a bit of the inside.

I hope you liked my card. 

Thank you for visiting.

Katya Bess


I will be entering my card at:
Summer Fun! 


Friday, June 3, 2016

Stamp AnnieThing June Release Day#3 Trudy


Hi and welcome to Day #3 of 
Stamp Anniething's June release!  

I love animals and my furbabies.... so this release is homage to PETS!

Here is Trudy and her very tweet friend!

Trudy will be available in the store NOW along 
with the other 2 stamps we showed you this week!!


*~*~*~*~*~*~*~*~*~*~*~*~*~*~*~*~*~*~*~*~*~*~*~*~*~*~*~*~*
Trudy looks so cute with her little birdie.
Here is my completed card. 
I used Copic colors:
W5, W7, W9,
R20, R21, R22, R24,
E0000, E000, E01, E11, E40, E41 and E42
I used Copic Refills R20 and R30 to
color the smaller roses (from Wild Orchid Crafts)
that I purchased from The Not2 Shabby Shop
The paper is Prima Marketing: Lyric Collection
The dies are from Spellbinders
The banner from Spellbinders I just hand wrote 
the message myself. 

Here is a little bit of my process:
First I colored up Trudy but I outlined the leg 
since I wanted it to be visible behind the cage.
Then, I fussy cut as I normally do
but I cut off the cage. 
(My baby didn't like that I cut off the birdie. LOL)

Next, I only inked the bottom portion of the stamp
on to the Prima paper.
After that, I used a Spellbinders Oval die
and traced the outer part to make myself a bigger oval.
(Need to take care of that from my wish list....
buy bigger oval dies. LOL  )

Oh yea! I didn't throw the little bird from the original 
stamped image. I colored up the bird so I could stick 
it to the cage that was stamped on the Prima paper. 
I didn't keep beak nor the legs since it will show with the
the stamped image at the bottom.

Finally I glued her and the birdie down and added flowers all around.

***********************************
Thank you for joining us for our June Release
 and have a great day!

Katya Bess

Entering card at:
Challenge #30: Our Furry / Feathered Friends

Challenge #268: Anything Goes 

Anything Goes (no digital projects)

Saturday, February 27, 2016

Shades of Red


It's time for another Theme Week!
This time its all about using 3 shades of a color!
*Yes you MAY use more than three shades, but there is a min of three for this theme week!*

We would love for you to participate with us in our THEME WEEK, and its quite easy to do so!
Simply create a project using ANY Stamp Anniething product (as your main focal point) in the set "theme" for that month.
Post your project to the corresponding album over at our Face Book Group page (Stamp Anniething Stampers)!
You may enter as many projects as you wish, but you will only be counted as ONE entry person.
A minimum of 5 people (not including DT Members) is needed in order for a prize to be given.

So here we go for February's Theme Week!

Make ANY project using the 3 shades of ONE Color!

All projects must be uploaded by midnight PST March 4th to qualify
Again, a min of FIVE entries for a prize win!


Hello Everyone!
In honor of Black History Month and National Heart Month
I chose to make Savannah - Howdy Partner an African American Cowgirl
and my theme color to be red. I chose the dies and papers patterns to
show she can be a cowgirl and feminine too.

Here is what I created for today!
Savannah - Howdy Partner 
I used the Desert Sand ink for a "no-lines coloring" on her hair, skin and lasso with Copic markers:
W5, W7, W9, E13, E15, E17, E33, E35 E18, R21 and R22...
for the clothing I stamped with Memento Tuxedo Black ink
 I shaded the red hat and boots with R46 and R35
since the paper is already red
then I fussy cut and paper pieced the clothing.
the edge dies are from Spellbinders
called Borderabilities Card Creator Dies Curved Borders 2
The flower I created with the Spellbinders Mega Dies: Carnation Creations,
Spellbinders Lacy Oval and Spellbinders Classic Oval dies.


Here is a Work-In-Process photo before I colored the hair
When you fussy cut and paper piece
patterned paper it makes you feel like 
playing paper dolls like when you were a kid 
or play pretend you're a seamstress... 
LOL or is that just me? Teehee yea it's probably just me.

Here she is all dressed up for the Rodeo 
I really love the little details on this stamp such as the
tiny stitching on her hat, skirt and boots- some real fine tailorin'. ;)

If you don't like to fussy cut like me then you can
chose to have the free SVG outline for Savannah HERE...

Thank you so much for looking. 


Sunday, February 21, 2016

Easter Blessings

Hello Happy Sunday Everyone!

Today I have a CAS card for you all. I made a simple Easter card using Jemma - Party Time. My 8 year old Jade has a dress very similar to this one so I colored it just like hers.


As you can see I did not make it a party theme

but an Easter theme instead.

Hair: W9, W7, W5

Skin: E15, E13, E11, R22, R21

very simple...
The dies are from Spellbinders Labels 7 Nestabilities
and Our Daily Bread Faithful Fish Pattern
The paper is from Recollections. 
Here is a close up of the glitter from the Sakura Stardust GellyRoll I used.

Thank you for stopping by. 


Tuesday, December 1, 2015

On the First Day of Christmas

Hello Everyone!

It's December and Christmas is here! Woot woot! Happy First Day of Christmas! So this post will be short and sweet... if I don't think of random things to ramble on about. LOL

Anyway, I am in dire need of Christmas/Holiday cards and so I'm digging through my stamps... I have a whole bunch but for some reason I get into this weird thing that I have to turn a non-holiday stamp into a holiday stamp. LOL     Anyway, here is my card.

I have turned a super girl into Elsa from Frozen. LOL  
 I know I had neglected my Prismacolor pencils for a very long time.
So here you go. 
Oh and another thing I took notes of my pencils... aren't you proud of me? LOL  

skin: PC927, PC943, PC1084, PC928, PC929
eyes: Uni-Ball Signo Pen Broad, Sakura Gelly roll, PC903, PC904 and PC935
Dress: PC992, PC905, PC938 and Clear Star Sakura Stardust pen
Hair: PC941, PC997, PC 914 and PC938
whooo!!! That was too much typing. LOL    
The sentiment is from The Greeting Farm.
 I couldn't get a good photo of the shimmer in her dress and shoes 
but you can see it a little.
Here is a close up. 

Oh yea here is the original image. 

I hope you like my card. 

Thanks for stopping by.

Katya Bess


Tuesday, August 4, 2015

Digi Galore DT: KSD Sunday Afternoon

Hi there!

Tonight I'm coming in with a sort of simple card I made for my design team over at Digi Galore Challenges.

This month we are showcasing images from KarleighSueDigis Easy shop. This is my first time using an image from this artist. :)

The image I used is:

I colored her entirely with Copic markers.
The papers are from Bazzil Basics that my friend BreAnn sent me
and the pattern paper is from Doodle Design Inc. 
6x6 Fruit Stand paper pad I got from  Joann's
The dies are from Spellbinders and from My Creative Time
The sentiment is from TPC Studio called "Faith Greetings" clear stamp set


Here is a close-up of the face details which seems to get faded in smaller photos. 

Hope you like the way I'm showcasing her. 

Thank you for stopping by.

Katya Bess

Will be entering my card at:


Saturday, February 28, 2015

SBS DT: Flying with Fairies

Hey Everyone!

Happy Weekend and Welcome to a new SBS Release day!

There are 5 images to this release but I was given 2 lovely images to work with.
Check them all here for a special limited price
http://simplybstamps.net/item_3109/Flower-Fairies-Digis.htm

I don't have the links yet but their names are Frou Frou and Wendy you will be able to find them under the "New" category on the site, here is the link: http://simplybstamps.net/category/new.htm


Sunflower Madame Frou Frou Fairy

I colored Frou Frou with Copic markers
The dies are from Spellbinder and from Hearfelt Creations
I tried to give her a funky little hair color. 

I colored Wendy with Copic Markers
I just made the tulips by hand... 
didn't even feel like turning on any electronic cutting machine... 
I tried to use complementary colors. 


Check out the blog
and you'll find more inspiration from the other awesome DT ladies. 

Thank you for visiting.

Katya Bess

Monday, October 20, 2014

TTPH DT: Warm Hugs

Hello Everyone!

Today it's the 64th Challenge over at Through The Purple Haze Challenge Blog.

This week we are being sponsored by Aurora Wings and I got to color We Love Snowman.
(click on the name of the digi to take you to the Etsy Store)
Thank you Mitzi for sponsoring us this week. Your images are always fun to color :)


Here is my completed card.

 I colored it with Copic markers.
I used Sakura Gelly Roll and Stickles to add glitter and sparkle 
to random areas of snow or snowflakes.
The snowflake die is from The Greeting Farm.
The circle I traced the inner part of my Spellbinders die so it 
wouldn't cover up the design of the My Creative Time wavy circle die.
The fancy label is from Spellbinders as well.
 I love those little kittens giving the snowmen warm fuzzy hugs lol!
It was fun trying to add a little fur on them. 
The small snowflakes are from a Martha Stewart punch.


I hope that you are able to play in our 64th challenge called 

I hope you liked my card. 

Thank you so much for visiting. 

Katya Bess


I will be entering my card here:
http://christmascardchallenges.blogspot.com/2014/10/challenge-47-inspiration-photo.html
click on link to see their photo inspiration.

Monday, October 6, 2014

TTHP DT: Stitchy Bear wood eld snow globe

Hello Everyone!


Hope you're having a happy Monday. Today I'm showcasing a shaped card for TTPH's 62nd Blog Challenge. WOW!


I been pretty busy but still trying to cut in some time for crafting... literally... I'll explain. Ha!


So since I've been a little under the weather and not enough hours to complete certain tasks I've been trying to find ways to cut in some time. So I didn't have time to set up my Cricut... cause it's boxed for the moment and I put away my Silhouette wires. My hubby and I have been moving things around the house and getting rid of stuff.... don't worry my crafty stuff isn't going anywhere. LOL So besides that I was low on time and that I'm a little bit lazy at times.... I decided to hand cut my snow globe card. Yup, I centered my largest circle Spellbinder on an A2 card and traced lightly with a pencil on the outer part. For my image I lightly as well traced but on the inner part of the circle without tracing over the feet. For the blue layer I actually used my Cuttlebug because I already had it next to my desk and I still needed an in between layer. For the Snowflakes I used two Martha Stewart punches that came as set and I rarely use them as corner punch or a border punch. I always use them solely for the snowflakes what a shame right? LOL So that was it and it didn't take long. What took longer was trying to make a nice bow... which I still feel that I failed miserably. I'm not used to working with that type of ribbon- it's a little harder to manipulate and it's a little thicker than I'm used to.


Okay so enough chatter... Here is my card.


I colored the image with Copic markers. 
I lightly used some drying Colorbox inks to shade around the edges
then I added dots light dots to the background and drew in some snow mounds.


I colored in some white snow with my Sharpie extra fine point paint pen for white snow
and with my Sakura gellyroll for the shimmer

Wasn't too bad and it didn't take me too long. 
The longest part was the coloring and then trying to fix the box.

Well, I hope you can join us this week at
Make a shaped card and make sure that you're only entering to 10 challenges for your card to be considered for a prize. 

Thank you to Stitchy Bear Stamps 
for sponsoring our DT this week. :)

Thank you for visiting.


Katya Bess


I'll be entering my card at: