Sunday, February 25, 2018

The hurrier I go the behinder I get!

Hello Everyone!

Today I'm showing a card that I started working on yesterday. I had colored the Alice image but for months I hadn't done anything with it. I was watching one of Kim Reid's live video's where she said there was a new challenge with "grass" and that alone gave me an idea of the scene to create with this image. I have created a video of my process of the background but I'm not sure if anyone would really want to watch it... it might be like watching paint dry for some. Plus I have a hard time figuring out what to say. haha.

I used two stamp sets for this plus my own art for the background. 
The stamps are both from Kraftin' Kimmie Stamps
and both are from artist Annie Rodrigue
Alice in Wonderland (Retiring soon)
Fabulous Frames 2! (retired rubber stamp set)
Also the small pocket watch is of a set from Vera Stamps

I found the free printable deck of playing cards at: http://www.dictionup.com/printable-mini-playing-cards/ I just distress them a little and curbed them with a pencil.

I hope you liked my card. 
Thank you for visiting.

Katya Bess


I will be entering this card at:
Grass

Thursday, February 22, 2018

LMMS Estrella hugs

Hello Everyone!

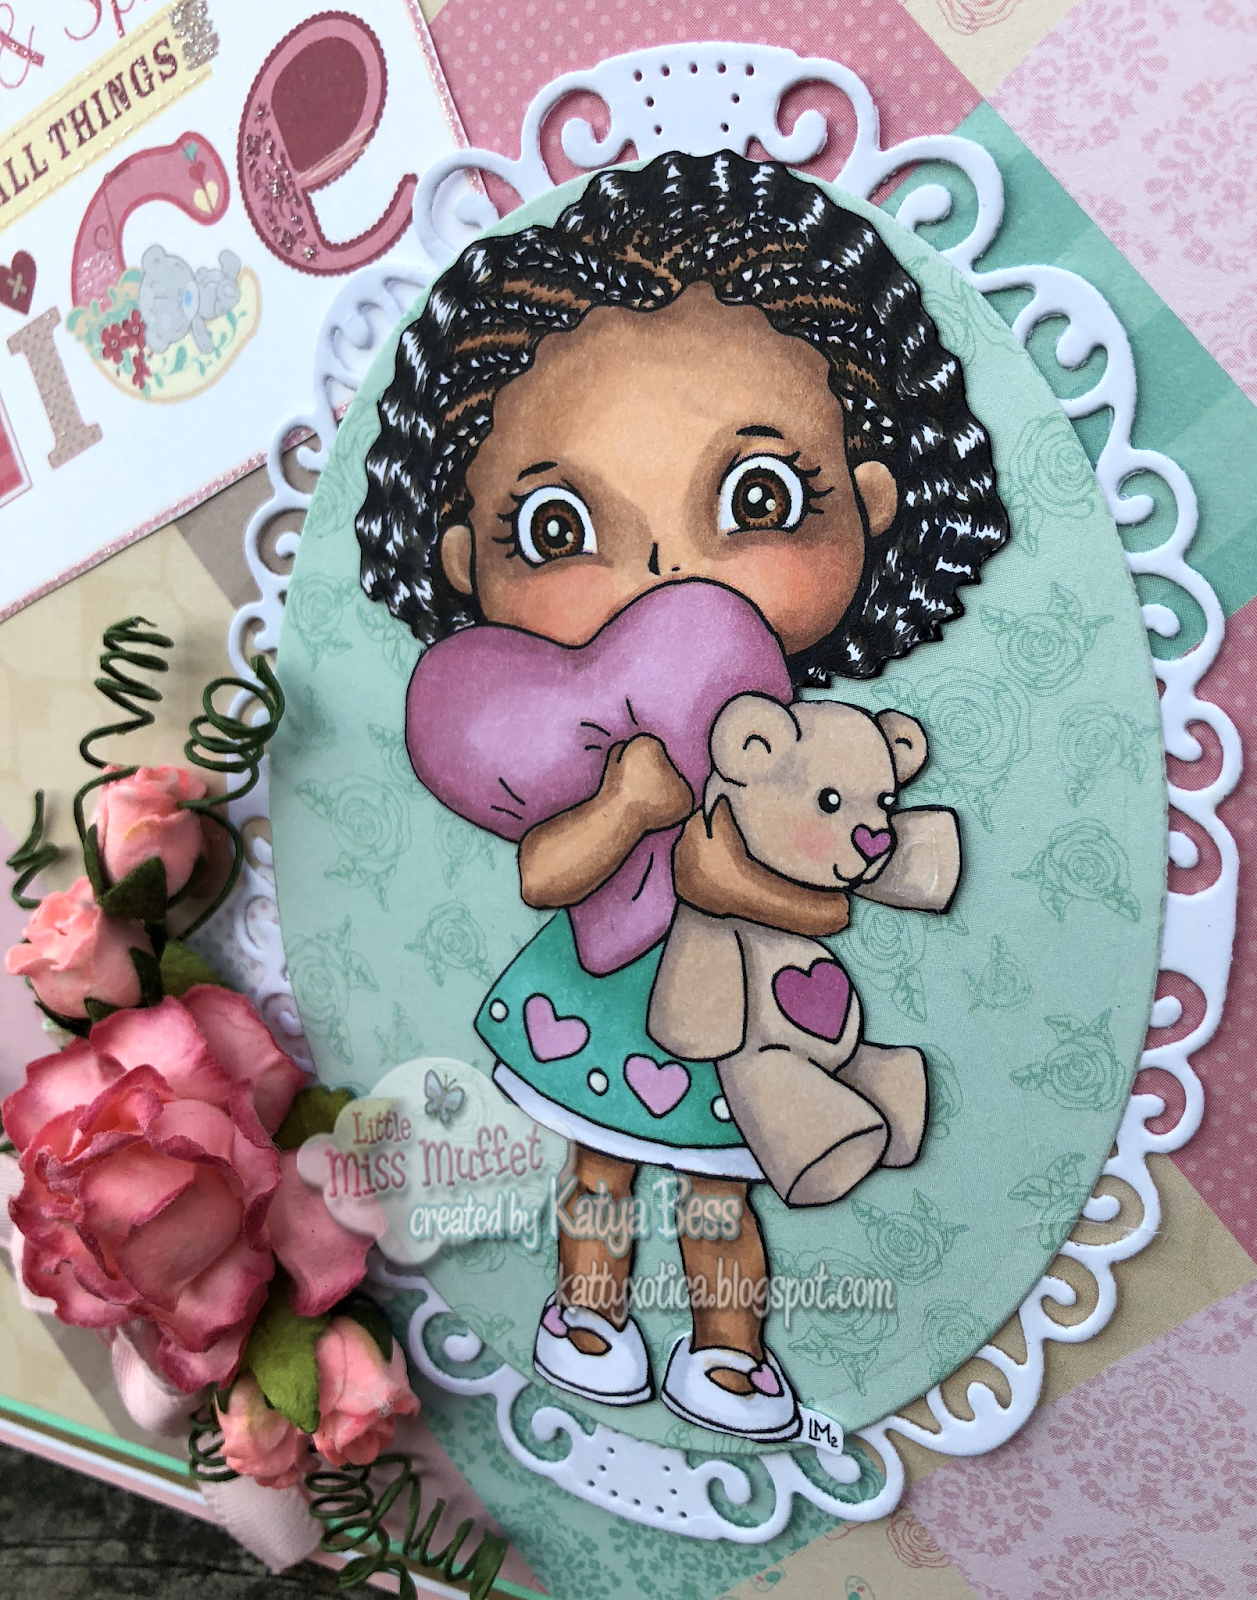
I hope you're having a fabulous day! Today I want to share an inspiration card that I created for Little Miss Muffet Stamps. I created this card in honor of African American History month and for the American Heart Awareness Month as well. I hope that you're able to find some inspiration with this card, I have listed the Copic Colors I used below.

The digital stamp from Little Miss Muffet Stamp is called 
and

Here is a little close-up of the image. 

Here is my Copic marker recipe:
E11, E55 and R30 
E99, E33, Muilti-liner Sepia 0.1 and Uni-Ball Signo Angelic
dress: BG32, BG34, BG23
RV11, RV32, RV34 and E04
bear: RV34, R30, E70 and E43
for the hair I used C9, W7 and W5

Spellbinder's Nestabilities dies
Elegant Ovals and the other one is a basic Oval
that I don't remember the name. 
The flowers I purchased from Jamie's Not2ShabbyShop
The paper is from Tiny Tatty Teddy Girl 6x6 Paper pack
 The sentiment also came from the same paper pack.
I home you like this card and hope that you 
got some inspiration from it.


Don't forget to check out the talented ladies over at
and make sure to join in on the challenges

Thank you for stopping by.


Katya Bess

Wednesday, February 7, 2018

LMMS: Colorful Birthday

Hello Everyone!

Today I've worked on a card showing various colors. The day I started coloring this image was a gloomy and rainy day. School for my children is somewhat far away and they have different times they get out of school (a big gap) so I end up having to be in the freeway for extended periods and when it rains it eats up a lot more of my time. That particular day was accidents left and right [sigh.]
At the end of the day I wanted to relax and had time to color and actually had the energy to color. LOL Since the day was all gray and gory I wanted to see many bright and cheery colors- I was inspired by the colorful palette in a Doodlebug Design paper pad. I don't have the cover so I don't know the name for the main papers I used. The "hello birthday girl" sentiment is also from Doodlebug Design but it was a different paper pad called Fairy Tales. The banner die and the rectangle die are both from My Creative Time.


I used Copic markers to color my image.


Here's a close-up of the image.

Thank you for stopping by.


Katya Bess


Wednesday, January 31, 2018

KKS: Do you love me now?

Hi Everyone!

I worked on an image for the 30 Day Coloring challenge. I haven't colored every single day but I have colored more that I usually do which made me quite happy. For this one I did challenge myself to use my Dr PH Martin's Hydrus watercolors. My watercolors have been in the box for a really long time.  I opened it months ago but didn't actually use them. Watercolors are more challenging to me because I don't have much control with them, I need better paper and of course I need lots and lots of practice. This time I colored two stamped images using the same colors but two different days with the same pallet- that's one thing I like I can just re-wet the pallet and boom! I reactivate the pigments.
Another thing I did this time is I blindly grabbed one of the rubber stamps I have in a section drawer just for Kraftin' Kimmie Stamps one section is all Clear stamps and one section is all Rubber Stamps. Most of I still haven't colored (sad to say) but I grabbed a random rubber stamp and it just so happens to be Drucilla. This stamp is kind of fun and sort of spooky to me. LOL I stamped it with StazOn (solvent ink pad) called Saddle Brown. This type of ink is perfect for watercoloring and I chose the color because I was trying to do an almost no-line color effect but it was darker than I wanted. I will have to find a lighter color but this time the color worked well with the colors I chose.


I couldn't find a sentiment that I wanted in my stash nor I could find something online 
and I didn't want it to be mean in any kind of way... so I created the sentiment myself on the computer. It was pretty simple as long as my program didn't crash on me. This usually
happens when my Mac needs to install new updates. LOL 

Drucilla - Kraftin' Kimmie Stamp (retired gray rubber stamp)
As soon as I grabbed this stamp I thought about a Crafty Friend on the other 
side of the country that loves spooky and twisted books, movies and tv shows.
She also doesn't like Valentine's Day haha she's 
Anti-Valentine haha which is funny cause I love Valentine's Day.

Here is a close-up of the image. 
Very carefully I added Glossy Accents to the heads of the pins
to give them dimension and shine.
Oh yes, I forgot to mention, I tried to keep a 
minimum palette and it was actually the leftover 
paints from stamped image (same stamp actually) I colored the day before.
The Dr. PH. Martin's Hydrus Watercolors I used are:
10H Venitian Brown, 2H Gamboge, 6H Pthalo Green,
5H Quinacridone Magenta, and 11H Carbon Black
After a bunch of mixing here and there from a day old watercolors...
this is how it looked without added shading with Prismacolor Pencils
plus the lighting is a little weird.
As you can see I only needed a tiny bit of watercolor paint
because the colors are super intense- very little goes a heck of a long way.
When the image was dry I went over certain sections with 
Prismacolor Pencils just to give the coloring some accent and definition, 
for example shading around the face, the hair, dress and the voodoo doll.
The hardest part was trying to find paper that sort of matched the colored image.
Good thing I didn't use too many colors this time. heehee

The dies are from Craftin' Desert Divas, CC Design,
The Greeting Farm and My Creative Time.


I hope you like my card
with slight twisted humor.


Thank you for stopping by,

Katya Bess


Thursday, January 25, 2018

LMMS: Ryker Smile

Good Morning!

It's time for a new challenge over at  Little Miss Muffet Challenges and as always it's an Anything Goes Challenge. Here is what I've created using Polka Dot Pal Ryker and one of the faces from Polka Dot Pals Add-on Faces. I always need some male/boy cards and it seems that I don't have one on hand...yikes... trying to get better at that. This image is perfect for different occasions too so I definitely had to color him up. :D

I used Copic markers to color him up. 
I was extremely indecisive on the skin and clothes
for some reason....  Then I decided to go with a 
green even though the background is green and maybe I should of gone with a 
muted red or some type of reddish brown. I don't know maybe I'll do another card.  
I also want to try another card with "mess" with the texture of the hair. 
Back to the green... heehee since I colored his gree and I had already picked and cut
up the paper to make the card I left a white edge when cutting the image.
I typically do not like leaving the white and I didn't like it agains the green
so I glued the image on black cardstock and left an edge around that and to me
it really pops and he doesn't fade into the background.
Oh yea! I almost forgot to mention that the paper is from the Michael's Recollections line.
I bought the big 12x12 when it was on sale I think I paid a little more than $5-tax included.
A couple weeks later I saw the same stack but in the 6x6 pad but I didn't
buy it cause I was trying to quickly buy something else while I was supposed to be
grocery shopping... (shhhh don't tell my husband... or my kids) 
but also the 6x6 paper cost more than the 12x12! What's up with that?
The 6x6 paper cost $5.99 and no good coupons available that week. LOL
Here is a close up. 
I added Glossy Accents (that I did but with a 50% off coupon a different week LOL) 
to the lens to give it that "glass" look and same with the flash.

The "Smile" die and the "polaroid" die with the sentiment are all from My Creative Time.


I hope you liked my card and didn't get bored with my rambling.


Don't forget to check out
for digis, clear and rubber stamps

AND don't also check out the very talented ladies
on the design team and make sure to link up
your creations at:

Thank you for visiting.

Katya Bess

Sunday, January 21, 2018

LMMS: Caroline You Make Me Happy

Hello Everyone!

Today I worked on a card with the cute digital stamp from Little Miss Muffet Stamps, she is called Polka Dot Pals Caroline and I used clear stamp Polka Dot Pals Add-on Faces to give her a happy face. :D I was inspired by a wonderful and talented crafter from The Little Miss Muffet Stamps & Inspiration page on Facebook- her name is Zeljka J.G. She had colored up at cute little yellow ducky with rain boots and an umbrella. I love how simple it is designed and the bright yellow ducky brought at smile to my face.

Here is my card

I did not write all of my Copic colors this time. I've been on a roll coloring at least one image even if it's partially colored for the The Daily Marker 30 Day challenge that Kathy Racoosin is hosting. 
I've only missed posting one day even though I did color that day. (oh well) The day I missed posting I got home, I made dinner and ate with my family after that, I pretty much laid down and woke up in the middle of the night but it was already the next day. I thought I just needed a good 45 minutes.... I think I slept for like a 4 or 5 hours. LOL 
I did take a note of a few colors though.

YR00, E33, E53, R21, R30
W5, W7, W8
Y19, Y35, Y26
RV06, RV17, YR14, YR16
YG67, G46, E74, B41, C4

Glossy Accents on the puddle 
(in the photo it was still a tiny bit opaque and now it's very glossy)

Here's a little close-up of Caroline.

Here's the original image without the Polka Dot Pals Add-on face


from Amazon and I'm diggin' it so far to stamp my rubber or clear stamps.
I used a rubber stamp from CC Designs called 
Flowers & Rocks (Olioio) to add a little bit of 
interest and to surround a little puddle I created.
It's a little hard to see but I used Glossy Accents
to make the puddle actually look wet.


I tried to use some of the colors from Doodlebug Design's 
6x6 paper pad called: Hello Sunshine
The stitched rectangle die is from My Creative Time


Don't forget to check out the 
for more inspiration and enter challenges. 

Thank you so much for visiting.

Katya Bess 


Thursday, January 11, 2018

LMMS: PDP Kyree Ice Cream Shop

Hi Crafty Friends!

Hope you're having a very blessed day. I'm excited to show you a Little Miss Muffet DT card I created with a super sweet image called Polka Dot Pals Kyree and Flavors of the Month Sentiment from http://www.littlemissmuffetstamps.com/ The digis is currently on sale for $1.00 as well as a some other sweet images- you gotta go check them out for yourself.

I had a fun time coloring Polka Dot Pals Kyree, I also stamped a face from Polka Dot Pals Add-on Faces. I ran out of printer ink right after a test printing on a Kraft cardstock since I planned to some Copic Coloring. I have some ink now but I ended up coloring on that Kraft cardstock and it's a little challenging since the colors show up different than on a white piece of paper. I never throw away stamped paper- there is always a way I can use my stamps even if it's not the paper I intended to use- I can always work on it another time. The good thing is that it gave me an idea (Ding! Lightbulb above my head LOL)  I attempted for it look like one of those vintage Polaroid pictures. I have some pictures from the 1980's that have a certain look to them that I gathered inspiration from.

Copic markers I used:
E000, E13, E11, R22, R21, R30
E23, Y32, E71, E27, Y19, Copic Multi-liner Sepia, White Uni-ball Signo Angelic, 
Y35, E35
E35, E15, E79, Copic Multi-liner Sepia, RV21, RV14, R29, E41, Prismacolor White
BG49, BG15, BG13, BG34, Y35, YR14 and YR16

Prismacolors used
White and Black

Distress Inks Used:
Evergreen Bough
Vintage Photo

Here's a better look at the coloring.

Here is a little snippet of my creative mess. LOL
I was happy just to finish the polaroid picture but I really need to create more cards 
to have on hand for friends, teachers or people appreciate. 

Polka Dot Pals Kyree looks super happy with her massive ice cream cone
and the background sentiment made me think of an ice cream shop.
It's never too cold (even in winter) to eat ice cream, especially if it's indoors. LOL
I sketched in some lines to make a black and white checkered floor.
I could have done the black tiles with a copic marker but I wanted it to have the same
texture or look... I hope I'm explaining my self correctly. I just used Prismacolors
black and white and I colored lightly and maybe adding a little more coloring around the
edges of some of the tiles. After I glued my image on some colored cardstock
I finished it off with some Fun Tickets stamps and dies from 
My Creative Time and attached them with a little brad from BoBunny Isabella collection.


I hope you liked my card.

Make sure to check out the other very talented ladies at
the challenges are always ANYTHING GOES
Also don't forget for the mega discount on some of these
super sweet images at


Thank you for stopping by.


Thursday, January 4, 2018

LMMS: Happy Birthday Cupcake!

Hello Everyone! Happy New Year!

This image is a rubber stamp from Little Miss Muffet Stamps, she's called Polka Dot Pals Yang and I used a clear face from the Polka Dot Pals Add-on Faces. I wanted to color her in an African skin tone since it's for one of my Hubby's relatives that has a January birthday. I chose the color red because it's her favorite color and her birth stone is the Garnet.

It took a while for me to finish my card... besides being the holidays, everyone in our household was sick with flu symptoms and all of us had this bad cough. I had no time for crafting which puts me in a really grouchy mood. I wanted to make sure to add lots of little details to the card and I am happy that it's finished.

Some of the colors I used on this image are:
E31, E33, E74, E27, E23, E04, E07, E79, E00, C1 N2
W9, W7, W5
E97, E27, E99, E77, Sepia Copic Multiliner
N2, N0, 0
R24, R29, R46, R56
B21, B95, B97 and B45
I drew in the stool myself.
(Must find a chair or stool or some stamp of that nature for her to sit on...  I saw some of the inspiration photos from the LMMS store. LMMS store here I come... heehee jk. I need a nap actually.)
The scalloped die is from CC Design,
The oval dies are from My Creative Time,
The Happy Birthday dies are from Elizabeth Craft Design called 947 - Happy Birthday Pop-Up
The Recollections paper pad is called Valentine
The blue paper it's also a recollections paper but I stamped it
with a grid mesh using Distress Inks to give it a worn jean look and to
break up a lot of that beige in the background.
I found the January birthday poem online.


Here is a close-up.


Thank you for stopping by.
I hope you got a little bit of inspiration from this card.

Katya Bess


Entering card at:

Thursday, December 14, 2017

LMMS Christmas Vega

Hello,

Today I'm showcasing a card with image Polka Dot Pals Vega digi and Polka Dot Pals Add-On Faces from Little Miss Muffet Stamps and I used a background from Make It Crafty called Penelope Watching Santa Digi. I cropped the Make It Crafty Image and used the version without the Santa in the background.

I had fun coloring this scene even though I  have been sick... (whaaaaaah) I would have colored much faster if I wasn't sick though and on top of that busy Mom schedule. I started coloring the image with prismacolors but some areas that needed more coverage like the curtain, the night sky and Vega's dress I colored with Copic marker first. I did not need to use markers first but I found that it was a slight cheater method to lay down some coverage. I mostly used Prismacolor pencils though.

I tried to color Polka Dot Pals Vega digi to look like the person I am giving the card to. 

Here is a close-up of the image 

To view more inspirational cards from the other talented designers
as well as entering your card for the Anything Goes Challenge
check out the link below


Thank you for visiting.

Katya Bess

Thursday, December 7, 2017

LMMS: Lamb and Star

Good Day Everyone!

I hope all is well. I've been working on a few cards behind the scenes and this one is one of my simpler cards at the moment but it has a powerful meaning to me. I got the idea to make it a card from a bible verse. Matthew 2:10 (through verse 11)

The name of the Little Miss Muffet Stamp is Lamb and Star. The image was separated because I originally meant to add a die cut in between the mountains and the pasture but I ended up liking the image centered and I will have to make another card or two to show my original idea as well as the layout in which it was intended to be used by LMMS artist Barbara. The inside of the card is a rubber stamp from Our Daily Bread Stamps and it's called "Come Let Us Adore Him" 


I colored background with mostly distress inks straight on to the paper and then blended by using the mini ink blending foam. I made sure to block the image with a removable sticker or masking paper. When my background distress inking was done I colored in the star, the lamb and added a little shading and a few lines on the grass with Prismacolor pencils. I finished off the coloring by adding stars with a Uni-ball Signo Angelic pen and tracing over the black lines on the star. See! Easy peasy! :D For the sentiment in the front I hand wrote that myself... Every time I tell myself to not put my sloppy handwriting on the front for the next card... next card comes around if I don't have a proper stamp or die for it I mess it up with my sloppy hand writing LOL I don't know why I do it! Aaaaah! 


Here is the inside of the card. I ended up not using Kraft cardstock inside and went with 
plain white since I didn't need to use color pencils.
I know the stamp inside says it differently but I liked it a lot and the meaning is the same.

 9 When they heard the king, they departed; and behold, the star which they had seen in the East went before them, till it came and stood over where the young Child was. 10 When they saw the star, they rejoiced with exceedingly great joy. 11 And when they had come into the house, they saw the young Child with Mary His mother, and fell down and worshiped Him. And when they had opened their treasures, they presented gifts to Him: gold, frankincense, and myrrh.

I hope you enjoyed this card as much I enjoyed coloring and making the card while playing 
Norman Hutchins - Emmanuel song on a loop. heehee

Thank you so much for stopping and don't forget to stop by the links below for more inspiration
and

Katya Bess